
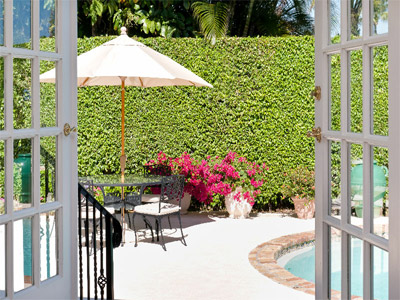
A Primer on Painting Wooden Doors
Published: April 28, 2020
Honestly, painting a door is not a very complex process. While it is a simple job, it is still something that you should put some thought into. Professional painters are pros for a reason. They use their considerable skill and experience to avoid problems and errors. If you take the time to do it right, you can paint your own wooden door and get some very professional results.
We're going to be talking about the general process of painting doors, and for the most part what we say here will apply to interior and exterior doors equally. There are a few differences between the two types of door, but mostly in what you could do, not what you have to do. A good general rule is use a tougher/outdoor quality paint for your exterior doors. With the inner doors you have more flexibility, but a good quality paint is never a bad idea. Doors take abuse, no matter where they are, so treat them right and do not go cheap on your paint.
While this article is not about paint per se, we will mention some points about the wonderful stuff. For example, it might be better to go with a glossy or semi-gloss/satin paint when painting your doors. These show off the door a bit better, and make it easier to see when they are dirty and need a bit of cleaning.
Painting is a lengthy process that can be very disruptive to the daily life of a home, so it is not something you want to do too frequently. Imagine a door that you use a lot being suddenly off limits as it dries! Of course, when a door is being painted or worked on, that's when everyone and their brother will want to use that door for one reason or another. Count on that! Paint when you need to, but do it right so you do not have to do it again and again.
Step 1. Prepare Yourself and Your Painting Area
As much as you might just want to grab a can of paint and start painting, you really should plan a bit and do it right. Get a drop cloth and wear clothes that are snug and comfortable. Also, clothes that you don't mind splattering with paint - you will get paint on yourself. Why snug clothes? You do not want a flappy sleeve to accidentally brush across your freshly painted door. There are good reasons that people rarely paint doors in business suits or wedding dresses. So your first step then is prepare your painting area with at least a drop cloth and wear old jeans and a t-shirt.
Beyond that, ventilation is crucial. The fumes that paint generates can contain concentrations of many different carbon-based chemicals (formaldehyde, ethanol, etc), known collectively as Volatile Organic Compounds (VOC). When these are inhaled they can cause eye and throat irritation, dizziness, headaches, and even memory loss. Long term exposure can contribute to asthma. These dangers can be all the worse for children and pregnant women, so this is nothing to be cavalier about. You can get paints that do not contain VOCs, and we certainly recommend low or no VOC paint, especially with children around. Some basic precautions can also help mitigate risk. Proper ventilation is one. Make sure the air is moving a bit where you are painting and has some way to get outside and away from your painting area. Also, wear a painting mask over your nose and mouth. That is usually all you need to do. However, if you are still concerned, just shop for paints that do not contain VOCs, do your painting outside (more on that later) or consider hiring a professional to paint for you.
Step 2. Prepare the Door
If you're painting a brand new door, straight from the mill, you get to save a bit of time. However, if your door has been installed, you will want to first remove all the hardware on it. Take the knob and lock assembly off as well as anything else mounted on it that you can remove. Basically, remove anything you do not want painted. If you cannot remove it, then cover it with painters' tape and newspaper, or, if you have to, masking tape. We personally do not like plain masking tape for painting jobs, as the tape often leaves little glue patches, is not a tight seal to whatever it is on (so paint can leak under it), and can be a chore to remove.
Next, consider what to do about the door's hinges. Here we have a potential difference between painting interior and exterior doors. For inside doors, you have the option to leave the door mounted on its hinges. Upright, easy to reach, and moveable, this is often a convenient way to paint more quickly, especially if you have a lot of doors to do or only need to do one side of a door. The usual Butt hinges that most modern doors use also are discreet enough to not merit a lot of concern.They can be covered with tape pretty easily, though watch those hinges carefully as you paint. Moving the door, even a little, can undo that tape and expose the hinges to paint splatters. So leaving the door mounted on the hinges while painting is very doable, but there are problems with this approach.
WIth the door mounted on its hinges you will have some problems reaching some trouble spots. That is, the very narrow top part, and the very bottom close to the floor. For outer doors, the very top is a real problem. Depending on how tightly your door is situated in its frame, you can get a bit of water from rain or condensation pooling there. Storm doors largely fix this problem, but you still want to be able to paint the very top of the door. We know that nobody can see that part, yes, but painting a door helps protect it from moisture seeping into it. Do not leave gaps or unpainted spots for water to begin to work its way in! That means painting the top of the door. And if the door is mounted on its hinges, and you are not tall, reaching the very top edge of a door can be a problem.
The very bottom of the door is also an issue. You do not want water seeping into the bottom of your door, so you want that flat, narrow bottom part closest to the floor painted too. This is particularly a problem for Inner doors. Sinks overflow, bottles get dropped, and floors in general see more liquids on them than we might expect. That means you do not want the bottom of the door unpainted and unprotected from moisture that might seep in. Again, with the door mounted on its hinges, painting the bottom of the door can be an issue.
My preference is to remove a door that is being painted from its hinges, and lay it on drop cloth covered sawhorses. This way you can reach every part of the door with no problem. Yes, this means a longer time painting, as you have to do one side, then the other, but we think you get a better result. And this approach means you have to take the door out to a place with space, like a garage or porch, which takes care of the fume problem as those places are usually well ventilated.
Step 3. Clean that Door!
If your door is fresh from the mill, then cleaning is not usually an issue. In most other cases you really should clean the door before painting. Dirt, dust, glue residues, grease, and heaven only knows what else can wind up on a door. You do not want that under your paint, as that stuff breaks up the seal between the paint and the wood it is supposed to protect. So wash that door off. For cleaning we usually do not mess around and use a TSP cleaner, a mild mix, ½ cup of it in 2 gallons of water. For serious cleaning use a full cup in 2 gallons of water. And always wear gloves and eye protection when cleaning, whatever you use.
Once the cleaning is done, and the door dried off, sand your door gently (yes, even if it is primed already) with Fine grade sandpaper (150-180 Grit). This will help to remove any chips or flaws on an already painted door, and in general help the paint to grip better. Always remember to wipe the door down when done sanding, to remove any dust it generates (and keep that painting mask on so you do not breath that dust in either). If there is paint on the door already, you might consider using a deglosser too, but in my opinion that is optional.
Step 4. Prime, Paint, and Paint Some More.
If your door is not primed, you should do so, picking a color of primer as close to the actual color you want to paint the door as possible. Wait till the primer dries, then sand it like we mentioned above. After that is done, you are really ready to paint!
We prefer to use an actual Brush to paint woodwork. Some folks use rollers to paint, and we can't blame them. It is faster to use a Roller, no question. But rollers tend to leave a texture in the paint that multiple coats do not really smooth out. With brushes, you have a lot more control, and the result can be as smooth as glass. So take a bit more time and use a brush. Save the rollers for when you are painting walls.
Always paint with the grain of the wood, if you can (or can see it). Paint up and down on the vertical elements of the door (the Stiles), and left to right on the horizontal parts (the Rails). When you come to a seam in the parts of the door, paint along the seams, not across them. If you paint across them you can get gaps. Do not paint so heavily that you leave paint pooling on any spots on the door. If your door has Panels (raised or flat), paint those first, then work your way to the outer portions of the door. Do not forget the very top, bottom, and sides of your door!
Doors do take abuse, so give your door two coats, at least. Let one coat dry (wait about an hour), then apply the next coat. If you are painting a lighter color over a darker one you will probably need multiple coats anyway.
A word needs to be said about painting a door while outside. Do not paint on days when it is very muggy and humid. All that humidity is moisture, and you do not want moisture under the paint you are applying. Also, do not paint when it is very cold, below 45 degrees Fahrenheit, for example. There usually is water in the paint you are using, and cold temperatures can affect it, making paint flow oddly and dry badly. However, new paint formulas are always being developed, so check what the instructions on the paint you are using recommend or check with the paints manufacturer. Some paints out there can be used well at freezing temperatures, in theory. Also ventilation is great outside, true, but so is the chance that something will blow or drop onto your newly painted door. Try to have some sort of roof or something above you while you paint or just keep a close eye on your newly painted door. If you are painting your door to make a good impression on folks, then you do not want an old napkin to blow onto your door and stick there (though what constitutes a "good impression" can vary from person to person, of course).
Step 5. Completion
When your door is all dry and done, then you can remount your hardware and hang that door back on its hinges. With a little bit of planning and consideration, you will see professional results that will sustain your door through most anything your family throws at it. It's not rocket science, yes, but painting is an art after all.
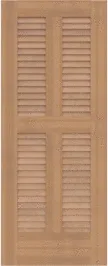
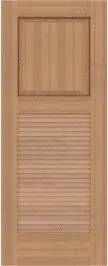
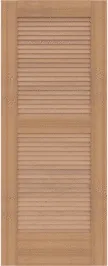
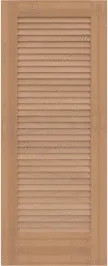
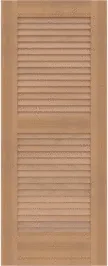
Build your new Custom Louvered Doors and get a Free Instant Quote Today
Our state of the art designers allow you to design and build completely customized Louvered Doors to fit your exact needs.
Questions or concerns contact us here or via 412.641.0177 .
Build an Instant QuoteGet Started Designing Your New Solid Wood Doors Today!
Check Out Our Line of Louvered Doors
Need Help?
Contact Us @ 412.641.0177
Recently Published
Interior Cabinet Door Styles That Elevate Your Kitchen Or Bathroom
Published: November 12, 2025
Why Mortise
Published: October 23, 2025
From Shaker To Raised Panel: Cabinet Door Styles That Transform Your Home
Published: October 08, 2025
How To Match Door
Published: September 30, 2025
Choosing The Right Exterior Shutters: Louvered, Board
Published: September 25, 2025
The Warmth Of Wood: Barn Doors Tailored To Your Home
Published: September 09, 2025
Classic Style, Modern Strength: Custom Wooden French Doors
Published: September 03, 2025
Built By Hand, Designed To Last: Custom Wood Louvered Doors
Published: July 07, 2025
Flat Panel Shutters For Colonial, Craftsman, And Farmhouse Styles
Published: May 28, 2025
Bring Old-World Charm Home With Custom Wooden Louvered Shutters
Published: May 04, 2025